How to make a modern country chair with your own hands. How to make a garden chair with your own hands? Do-it-yourself garden chairs made from bars - drawings
“From the presented material you will learn how you can make a “Garden Chair” with your own hands and install it on your site, for example, in the shade of a fruit tree (apple tree). On a chair, resting after working in the garden beds will be much more comfortable and enjoyable, because the inclined back relieves the load on the spine.
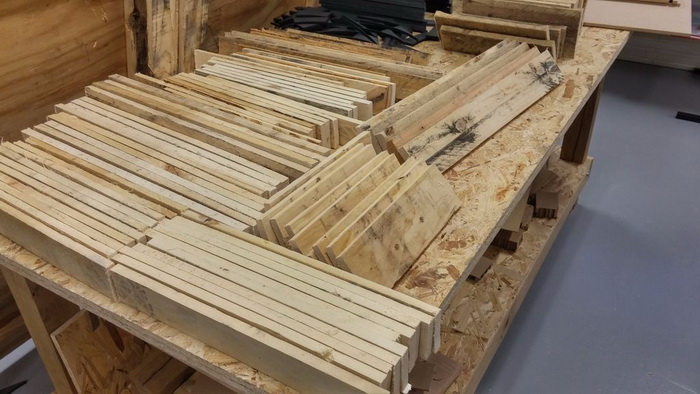
To make a chair, you do not need serious knowledge of carpentry and carpentry; everything is extremely simple and practical. The material is also the simplest - a 25-30 mm board and screws.
Let's look at the entire process of creating the "Garden Chair", and also look at what exactly the author needed?
Material
1. board 25-30 mm (soft wood)
2. screws (for wood)
3. stain
4. varnish
Tools
1. hacksaw
2. screwdriver or screwdriver
3. ruler and pencil
4. brush
5. sandpaper
The process of creating a "Garden Chair" with your own hands.
Getting your own country furniture is not so difficult, especially if you have the material (pallets or boards), the boards must first be planed and sanded with sandpaper, and then just follow the author’s photo instructions.
First of all, armrests are made from the board (in the shape of the letter P) and everything is twisted using wood screws.


The rear legs are screwed at an angle to the front ones.

A seat made from the same board is sewn onto the plane of the rear legs, and a cross member is also added to strengthen the structure and provide greater rigidity.

The backrest is made in the same way, the boards are screwed to the lower and upper crossbars.


To give garden furniture for a more noble appearance, it can be covered with stain and varnish, or painted in any color at your discretion)
As you can see, there is nothing complicated in creating a garden chair, everything is extremely simple and clear.
So, don’t throw away pallets and planks after construction or renovation, they can be used to make cool furniture.
This concludes the article. Thank you for your attention!
Come visit more often. Don't miss out on the latest in the world of DIY!
The article is presented for informational purposes only!
Every day, on the way to work, we dream of long-awaited holidays, weekends, to go to our favorite summer cottage, enjoy spending time with family and friends, and merge with nature.
A wooden chair in a country house is an excellent element of the interior, allowing you to relax comfortably and drink tea on the terrace.
Today, a cozy, well-equipped dacha should not be an unattainable luxury that requires exorbitant expenses. Schemes, drawings, technologies, Internet resources offer hundreds of ideas for creating garden furniture.

We invite you to create a chair with your own hands for your home or cottage.
Throughout our lives we are surrounded by furniture. Furniture production technology is evolving and improving. Garden furniture, designer, author's- it's everywhere, we're surrounded by furniture! It is natural to want to purchase high-quality, practical, stylish thing for a summer residence, at an affordable price.

Assemble a chair with your own hands for summer cottage or a private house can be owned by any owner.
Innovative furniture showrooms and designer garden furniture stores provide a range of services, selling stylish wooden chairs, for children and adults, with or without armrests, but not every average family can afford this kind of pleasure.

Your favorite area will be significantly transformed if it is decorated with a luxurious, reliable, hand-made chair.
It is not necessary to resort to enormous expenses to purchase a fashionable piece of country furniture. A handmade product will provide comfort and will harmoniously “fit” into the design of your favorite garden. A flight of fancy, a list of necessary tools - everything you need to make your dream come true in everyday life!

Wooden furniture has been and remains a classic that accompanies us everywhere.
In order for hand-made furniture to serve you for a long time, the design must meet certain parameters.

This chair is ideal for relaxing in the country and looks great in the garden.
| Transportability | As a rule, wooden chairs are used for relaxing in the fresh air, in the open air. In case of a sudden change in weather conditions, it is convenient to move the chair under a canopy if it is transportable. |
| Selection of quality raw materials | One of the important conditions in making a chair yourself is hardwood. Despite the high pricing policy, the design result, thanks to high-quality material, will be excellent. These species include: aspen, oak, pine, cedar. |
| Maximum weather protection | Exposing the chair to direct sunlight or heavy rain for a long time leads to a deterioration in its external condition. Preparation for protecting the finished chair begins at the earliest stages of design. High-quality, dry lumber is the key to success. If you initially purchased low-quality raw materials, dry the boards while working. Sand, saturate the workpieces with an antiseptic, and apply hot drying oil. At the final stage, after the finished product has completely dried, it must be opened with varnish. The material to get started is ready. |

Making a garden chair is not difficult; there are no complex connections or parts.
A set of standard questions for a self-taught furniture maker
How to make a chair out of wood with your own hands? Is it possible to build a garden chair with armrests yourself? How to make Baby chair and where to find correctly drawn up drawings and diagrams? A number of similar questions will certainly flash through the mind of a novice home master. There are various models of wooden chairs for summer cottages: folding and standard metal structures, wooden rocking chairs, comfortable chairs for two, children's and adults with durable armrests and comfortable seating.

Such furniture can be used without worrying about scratches and annual painting.
Not always, each of the above structures contributes to proper rest. Let's consider the process of making a simple model- wooden garden chair.
Preparing for work
The main components in preparatory stage is the presence of a list of tools and materials that should be in the master’s arsenal.
Necessary materials:
Required tools:
- Saw (disc);
- R ubank;
- Manual frezer;
- N wood saw;
- screwdriver;
- D rel;
- From the tube;
- L frost, tape measure, pencil.

Tools for work.
A preliminary calculation of measurements for the components of a cedar wooden chair is as follows. Dimensions are indicated in millimeters.
- Legs 4 pcs. (rear 2 pcs., front 2 pcs.)
- Two front legs – 20x254x787;
- Two hind legs - 20x76x533.
- The back of the chair is 20x279x914.
- Chair armrest:
- ABOUT it's time - 2 pcs., (20x127x406);
- Z rear support – 1 pc., (20x76x610).
- Jumper – 1 pc., (20x51x589).
- Insert strips – 2 pcs., (12x20x254).

The parts that make up a garden chair.
The process of making a chair with your own hands: step-by-step instructions
Creating Basic Parts
As a rule, work begins with a preliminary stage- preparation of basic elements. Having a drawing with detailed tips will facilitate the further process of making a wooden chair with your own hands.

Scheme for creating a garden chair with your own hands.
The most complex and time-consuming process is the manufacture of the side supports of the seat. You need to make a full-size template of the side support on cardboard.

Drawing of the side support of a garden chair.
1) Draw the first side of the part, lifting the segment on the left, then the next two at the appropriate angle.
2) Mark a perpendicular segment, heading towards point A.
3) Mark point C, draw a cutout under the transverse tie.
4) Extend the bottom side with a line, marking an angle of 75 degrees, with the vertex C.
5) Draw an arc, measuring the angle at point D. The radius of the arc is 116 mm. Connect the points with a segment.
6) Using a square grid, we draw roundings between points A and B.
7) The resulting template is placed on wooden board. We outline the parts and prepare for cutting.
To cut straight sections, you need to use a saw; for cutting out shaped sections, a jigsaw is perfect.

Drawings of garden chair parts.
IMPORTANT! In order for the cedar board to chip less, the cutting blade of the tool must be carried out in the direction of the grain!
After transferring the finished drawing to the board, we will mark a similar one according to the first diagram, using the already cut out part.
If you don’t have a ready-made armrest pattern, no problem! The circumference is not important.
1) It is necessary to make wedge-shaped supports for the armrests using a saw, bevelling the top edges by 6 degrees.

To make it easier to connect parts, use a clamp.
2)
Carefully screw the supports to the front legs. For fastening we use glue and screws.
3) We cut out the armrests and rear support.
4) Use sandpaper to clean the ends of the finished part.
5) Cut off the ends of the support.
6) We press the rear support part to the back.
7)
We mill the edges of the surfaces.

Attaching the armrests to the wedge-shaped support.
IMPORTANT! Glue plays an important role when making your own garden chair. Heat-resistant wood glue, unlike the common and frequently used PVA glue, will not lose its properties when exposed to high temperatures, moisture, and will not dry out or crumble. For this reason, to create a wooden product, we recommend using heat-resistant glue.
Assembly of parts
Before assembly, it is necessary to carefully coat each of the parts with a triple layer of antiseptic to preserve the internal surfaces. After processing the material, you can proceed to the next steps.
- We align the finished parts, having previously marked the drilling points.

We cut out the parts exactly along the marked contour.
- We make holes for the bolts andcarefully fasten the parts together.

Please note that the strength of the seat will depend on the placement of the boards.
- We install the rear leg perpendicular to the bevel of the support (similar to the first one, we assemble the second side of the frame), withWe connect the side parts of the wooden chair with the lower back cross member and the first seat bar.

The ends of the planks and the opposite ends of the legs should coincide, which will mean the correct position of the backrest.
- We install supports. We fix the supports with clamps.

The joint will be tight, which is what we need.
- We fix the upper backrest guide with screws, trying to align it with the lower cross member. We draw a line on all the cross boards, as well as on the bar of the back of the chair, then drill a pilot hole, holding the bar.

Afterwards, we secure the top with slats and evenly fix all the slats in turn.
- We draw the radius of curvature, cutting the strips according to the markings.

Having chosen the correct width of the final slats, we place it in place of the seat.
- We carefully sand the edges, upper surfaces of the backrest and seats. We close the screws with wooden plugs and sand them. Using hot drying oil or oil impregnation, we process the finished wooden chair.

Drying and varnishing the product is the final stage of production.
Making wooden garden furniture with your own hands
Decor is one of the important components. With the help of unnecessary things, pillows, bright rags, vine branches and painstaking work, you can achieve phenomenal results.

As you can see, making a garden wooden chair with armrests with your own hands is not at all difficult.
Fantasy, imagination, a charge of positivity, basic knowledge, diagrams and drawings - this is the entire list of necessary components for creating a wooden chair with your own hands. Desire and a little work are the key to success!

A wooden chair made by yourself will last for many years.
While maintaining its original appearance, such a chair will perfectly “fit” into the natural atmosphere and allow you to enjoy a comfortable rest.
In the considered option for making an Adirondack chair with your own hands, the design features are preserved, but there are no difficult carpentry joints. It will not be difficult to repeat the project by making wooden parts according to our drawings and assembling the product using screws.
The work uses planed 20 mm pine boards, galvanized screws 4.5x40 mm, bolts 10x60 mm with a square headrest and nuts with washers. A jigsaw and a grinder will speed up the process, and manual frezer will allow you to carefully round the edges, but all workpieces can be cut with a regular hacksaw, and the burrs can be removed manually with sandpaper.
 Adirondack chair structure: 1 - backrest bar; 2 - screws; 3 — upper cross member; 4 - posterior leg; 5 — side support (spar); 6 - bolts; 7 — armrest; 8 — front leg; 9 — seat bar; 10 — armrest support
Manufacturing of parts
The most complex elements of the chair are the two side supports of the seat. Make a full-size template on paper for the spars.
 Side support drawing
Draw the bottom side of the part, raise the first perpendicular segment on the left and two more at corresponding angles to point A. Mark point C and draw a cutout for the cross tie as shown in the diagram.
Mark an angle of 75° with vertex C, extend its lower side with a line. Draw an arc with a radius of 116 mm, measure the angle at point D and connect them with a segment.
Draw a curve between points A and B using a square grid or an improvised pattern as in the photo.

Place the cut template on the board, avoiding large knots and leaving small ones away from the edges of the workpieces. Trace the contours and file the parts using a saw on straight sections, and cut out the curly contours with a jigsaw. Guide the tool blade in the direction of the grain so that the wood is less likely to chip.

Transfer the drawings of the remaining elements of the chair onto the boards, also using a template, or draw directly on the blanks and mark the next identical part according to the first one cut out.
 Drawings of parts: 1 - upper backrest guide; 2 — lower cross member of the backrest; 3 — armrest (2 pcs.); 4 — armrest stop (2 pcs.)
The shape of the curves of the armrests is not structurally important; you can draw them by hand or using a pattern. Mark the second part in a mirror image so that the chips when sawing are at the bottom of the workpiece.
 Parts drawing: 1 — backrest strip (7 pcs.); 2 — seat bar (8 pcs.); 3 — front leg (2 pcs.) 4 — rear leg (2 pcs.)
Sand the ends, joining similar pieces together if possible. Route the edges of the top surfaces of the armrests and backrest slats, or simply soften the sharp edges with a sander.
Assembling the chair
Wooden furniture always begins to rot from the joints, the internal surfaces of which cannot be processed on a finished chair. Therefore, cover the parts with 2-3 layers of antiseptic before assembly.

Most of the components of the chair are connected with screws; the guide holes for them are drilled with a combined countersink, selected according to the thickness of the screws. When they want to hide the caps, they are deepened and covered with glue plugs.

Place a scrap board on the table and place the left side support and front leg on top. Align the workpieces according to the drawing, mark the drilling points.
 Chair side assembly diagram
Make holes for the bolts and fasten the parts. Install the rear leg, placing it perpendicular to the bevel of the support. Assemble the right side of the frame in the same way. Connect the sides of the chair with the lower backrest crossbar and the first seat rail.


Install supports on the front legs, securing them with clamps for convenience. Screw the armrests with screws.

Secure the top backrest rail, aligning it with the bottom crossbar. Right now it is possible to correct possible millimeter-by-millimeter marking inaccuracies and uneven cuts.

Small errors can be eliminated by shifting the upper cross member and trimming the angle under it. In extreme cases, you will have to unscrew the bottom crossbar and adjust the cutout.

Mark the center lines on the cross boards and on the center backrest strip. Holding the latter at the top with your hand or grabbing it with a clamp, drill a pilot hole and tighten the bottom screw. Check the vertical position and secure the top of the rail.

Screw all the strips one by one at even intervals. Take a piece of string and tie one end to a pencil and the other to a nail secured at the junction of the seat and backrest. Draw a radius of curvature, cut the strips according to the markings and sand the edges.
Having adjusted the width of the last seat rail, put it in place. Inspect the assembled chair and sand down markings, chips and other defects. Carefully sand the top surfaces of the backrest and seat parts.

Coat the wood with oil if you want to preserve its natural shade. Use synthetic resin glaze to create an opaque colored surface.
Wood is a natural and environmentally friendly material. It pleases users with its beautiful texture and high technical characteristics. Thanks to this, wooden gardening is in great demand.
You can buy them in a store or make them yourself. The second option is suitable for people who have patience, have necessary tools and know how to work with wood.
The main advantages of gardening wooden furniture worth mentioning:

Choosing a tree species for the garden
Since garden furniture is used outdoors under unfavorable conditions, the choice of wood type should be taken with full responsibility. Good choice will become:


Important: when choosing wood for making garden furniture, preference is given to hardwoods that are resistant to negative environmental factors.
Diagram and drawing in centimeters
When making any piece of furniture, it is necessary to make a preliminary drawing with all dimensions in advance. This drawing indicates not only the exact dimensions of each individual part, but also the materials of its manufacture and fasteners. You can make a drawing in different ways:
- draw on graph paper yourself with a pencil;
- use a computer program that will calculate the dimensions of each individual part with millimeter accuracy;
- find suitable option garden chair on the Internet and add your own ideas to it.
Tools and materials
The tools you will need to prepare are:

Materials needed:
- 30 pieces of hardwood veneer measuring 2.4 by 6 cm;
- screws;
- sandpaper;
- glue;
- furniture varnish;
- drying oil;
- scotch.
How to make an Adirondack yourself?
We will make a garden chair from 2 cm thick cedar planks. To make it, you need to prepare the following parts:
- 2 rear legs and 2 front;
- back;
- armrests (2 front supports and 1 rear);
- jumper;
- 2 strips - inserts.
Attention: the back legs, back, seat and armrests are cut out of wide panels.
When cutting out the rear legs, you must use a cardboard stencil. It is applied to the wood and outlined with a pencil. Next, the parts are cut out using a router or plane.
Back and hind legs
After all the parts have been prepared, you can begin assembling the back and rear legs:

seat
Now let's start assembling the seat:
- We cut out the front legs and screw them to the rear ones with screws. For the strength of the product, we additionally use glue.
- We make a jumper between the legs to make the chair stable and durable.
- We apply the workpiece to the front legs and mark the fixing grooves.
- Select a groove to a depth of 9 cm.
- We connect the jumper to the front ends of the legs with glue and screws.
Armrests
Let's start assembling the armrests:

Important: All screw heads are closed with wooden plugs and sanded.
Finishing of country furniture
After manufacturing and assembling the garden chair, you can begin finishing it. To make wood attractive, it can be painted with stain or treated with drying oil.. When using a piece of furniture outdoors, the wood is treated with antiseptics to prevent rotting and damage by pests. Next, the chair is covered with several layers of varnish. For these purposes, it is better to choose a water-based, moisture-resistant varnish.
Photo
As a result, you will receive aesthetic and functional furniture:


Useful video
The detailed manufacturing process is shown in the following video:
Conclusion
In conclusion, it is worth noting that by making a garden chair with your own hands, you will delight your friends with an original and aesthetically pleasing appearance with high technical qualities. To prevent wood from deteriorating under the influence of an aggressive environment, it must be treated with antiseptics and varnished.
In contact with
This is a garden chair of the simplest design and just as easy to make with your own hands, which is quite suitable for the first experience even for a person who is not experienced in carpentry. Clear drawings with dimensions, simple materials, possibly remaining after construction work, and ordinary tools will help you make such a chair in literally 2-3 hours. Following simple instructions, you just need to cut the required number of elements to size, mark and drill holes, and then assemble them as a construction set into a single whole.
Now let's get started and prepare for work necessary materials and tools.
Tools
- Circular or miter saw (a hacksaw will also work).
- Electric planer (if you use unplaned boards).
- Drill or screwdriver (with drills and bits).
- Measuring tool (tape tape and angle with protractor for measuring angles).
- Wrench.
- Pencil.
- Paint brush.
Materials
- Edged board:
90x45 mm (6.6 meters) and
90x20 mm (6 meters). - Furniture screws (with a semicircular head, galvanized or chemically coated against rust):
M10 100-110 mm - 10 pcs. - Self-tapping screws:
40 pcs. with a countersunk head 4.5x60-75 mm for fastening elements of the back, armrests and seat of a garden chair. - Abrasive sandpaper with P40-60 grain, for cleaning corners and splinters. Ideally, apply with grinder or a drill attachment.
- Protective impregnation for wood or stain with varnish.
Further, in the drawings below, the optimal size of the board for making a garden chair is shown, i.e. for example, if you take a standard edged board 100x50 mm, then process it with a plane and at the end you get approximately the optimal size of 95-90x45 mm or something like that. I think that a few millimeters plus or minus will not play a big role here. After all, we are not building a submarine, so there is no need to be afraid, feel free to take the tool and start working!
And the drawings will help you, All dimensions given are in millimeters.
Drawing 1. Elements of a chair made of 90x45 mm boards.

Drawing 2. Elements of a chair from a 90x20 mm board (inch).

Drawing 3. Elements of the chair assembly (sidewall).

Assembling the chair
1. First, let's cut all the elements of the garden chair and drill holes in them according to size using a drill with a diameter of 10 mm.
2. Now you need to treat them with abrasive sandpaper to avoid further minor injuries and splinters.
3. We assemble two sides of the chair, which, in principle, are mirror images of each other.

4. We fix all the elements with bolts, washers and M10 nuts. It is better to use furniture bolts with a flat head.

6. Now all that remains is to apply a layer of impregnation, paint or stain with varnish. Don't forget about intermediate drying.
The chair is ready!Agree, nothing complicated. You should have a pretty nice chair for relaxing in the garden.
If you make this chair together with such a garden bench, you can get a very interesting combination.
Below in the photo, look various options versions of this chair from different authors, maybe it will come to you too interesting idea how to add some flair to this simple design.Here is an interesting interpretation of a garden chair with vertical backrest elements along with a small table.


A very original modification by the author is to add additional slats to the seat and back of the chair, and also create a footrest, which at the same time serves as an additional amplifier. The chair is painted with stain and varnished on top.

Send your creations to me by email or leave them in the comments, and they will definitely be published.
- Edged board:
 Are there mites in Pitsunda? Ticks in Abkhazia. Pitsunda pine grove
 Red viburnum (Viburnum opulus L
 Nail Making Business How to Make Copper Nails
 Stone brazier: material features and manufacturing options
 Blackroot medicinal cultivation
 Fuel cells: a glimpse into the future
 Houses with a hipped roof projects