How to mount a surge protector on the wall. Do-it-yourself immovable extension cord. How to remove wires in an apartment - creative ways
The increase in the number of devices for which it is necessary to install a connection point inside an industrial or residential building has led to the development of many ways to attach the cable to the wall, both at the construction stage and in a long-term and firmly inhabited room. In various situations, you have to choose how to mount the wires on the wall so that they do not spoil the interior, comply with electrical safety rules, and are protected from external environmental influences and accidental damage. A significant aspect is the rational consumption of material and cost savings.
Types of wiring
The need to attach the wire to the wall is first considered from the point of view of the expected service life. Power cables coming from wire distribution boxes are intended for long-term use. Communication lines and television connections are of a temporary type, capable of changing their position if necessary.
Based on this, there are 2 types of laying electrical communications:
- open wiring, when the line is fastened to the outer surface of the structure and the entire network is accessible for inspection and partial repair;
- hidden wiring is embedded in the wall materials (walled up) and is accessible for operations at the points of connection to it (sockets, connectors) or intermediate switchings (boxes, panels).
If the hidden laying of the wire is made in corrugated or smooth pipes, then subsequent rapid installation is possible in these areas.

Example of installation in smooth PVC pipes shown in a series of photos:
In technical rooms, such wiring may remain uncovered by a layer of plaster; in residential apartments, it is located under a layer of finishing.
Precast concrete factories even produce special types of panels with built-in slabs and designed output points to connection boxes.
Influence of base material
Another factor influencing the choice of methods for attaching the cable to the wall will be its design and materials of manufacture.
Load-bearing and internal walls of the building are erected in the following options:
- reinforced concrete panels;
- brickwork (solid, hollow, multilayer, combined);
- wooden (logs/beams);
- poured monolithic concrete;
- sip panels;
- frame-panel construction.
In each specific case, it is necessary to decide which fastener to use for the selected type of wiring.
Brickwork
Diagram and method of how to secure the cable to brick wall, are selected based on the available tools and materials. As a rule, masonry is not left without a protective coating of plaster, so the wiring will be closed type.
If the volume of work is large, you will need a hammer drill and an angle grinder for leveling. Short sections can be completed by hand with a chisel and hammer.

An example of wiring on a brick wall is visible in the photo:
You can reliably fix the connection of the wires to the wall in simple ways, which do not require the expense of special fasteners: quick-drying mortar (alabaster, plaster, glue), wire to driven nails/screws, strips of tin + nails. The main condition is reliable fastening without the possibility of displacement or sagging.
After the cable installation is completed, the channels will be. To prevent them from affecting the monolithic structure of the applied mortar, the recesses are covered with a reinforcing mesh.
Monolithic solid surfaces
TO concrete wall the wires are attached with dowels using a mounting gun or manually drilling holes for installing a plastic sleeve, to which a fixing bracket or clamp is screwed with a screw.

A version of what the plastic fastener looks like is shown in the photo:
Depending on the diameter of the cable (bundle of wires), staples, perforated metal tape of industrial production and home-made are also used as fasteners.
The use of a mounting gun on various types of cable and corrugated concrete fastenings is demonstrated in the video:
Laying in pipes
Monolithic concrete surfaces are not installed; wires are fastened on trays, in pipes or using corrugations. The wiring can remain open, be mounted inside the wall during its construction, or be hidden under the finishing trim. Sometimes, to simplify the work, channels are cut into the slabs of permanent formwork, but this solution leads to disruption of the uniformity of the thermal insulation protection of the house in the places where the polystyrene foam board material is removed.
The feed-through Ø of various standardized products allows you to select the material in which the appropriate number of supply wires can be laid. The characteristics of corrugated PVC pipes for laying power networks are presented in the table:

Before installing the corrugation according to the design diagram in the self-leveling wall, you need to thread a soft wire into it, so that later you can easily insert the wires. If you need to lay several cables in one tube, diverging in different directions in intermediate fittings (tees, elbows, crosses), then thread the required number of wires in directions, and the corresponding ends are marked in different colors (paint, colored electrical tape).
If such preparation for pulling the soft core is not made in advance, then you will have to use a cable (approximately Ø 3 mm), which confidently passes into the pipe at a distance of 3 - 4 m. The end of the cable must be closed with soldering or a round nozzle so that it does not fluff up in the narrow corrugation , did not get stuck, did not damage it when feeding forward with scrolling.
In conditions that do not require a strict aesthetic approach, in technical rooms, to reliably protect external wiring, a more rigid metal hose is used connecting distribution boxes(also metal). The principle of attaching it to the wall is no different from the plastic corrugation and is shown in the diagram:

In all cases (pipe, corrugation, metal hose), it is important to firmly fix the cable exit into the connectors of the attached box at an angle of 90°, so the first fastening is placed at a distance of no more than 10 cm.
Walls of different densities

Depending on the brand of wire and the material in which it will be installed, the wire mount on interior wall may have different designs.
In sufficiently strong plaster, when there is no need to attach the corrugation, you can drill holes and hammer in staples - dowels with a wire pre-inserted in them. An example of such fasteners is visible in the photo:
On surfaces made of wood, slabs pressed from sawdust, install different kinds staples and clamps (as on concrete monoliths), in which screws and nails act as fasteners. Installation is carried out quickly by hand, and a construction gun replaces an electric screwdriver.
Thin wires for the Internet and telephone can be attached to the tree. This is a special screw that is partially screwed into the wall, and a thin conductor is screwed onto the protruding part in a knot.
For soft bases such as gypsum board sheets, plastic staples and clips are used, which are simply nailed with small nails. The fastest way in this case will be to use special U-shaped staples and a construction stapler. Such brackets are designed for quick installation of wires and have plastic stops so as not to crush the current-carrying conductor.
They hide the wiring in the apartment using plastic skirting boards, which have internal cavities covered with a decorative cover. All that remains is to mount the baseboard and make exit points to the sockets.
A popular method of fastening cables, combining the ease of laying open wiring and not being conspicuous for viewing in a closed type, is plastic cable ducts. A bundle of wires in a box covered with a lid is always available for inspection and switching changes. The channel is attached to the walls with screws, the conductors inside it with plastic ties.
Boxes and distribution boxes for them are available in different sizes; you can always choose the appropriate brand for a specific network diagram. In appearance, such boxes on the walls of an office or home have become familiar and do not cause discomfort in the perception of the situation.
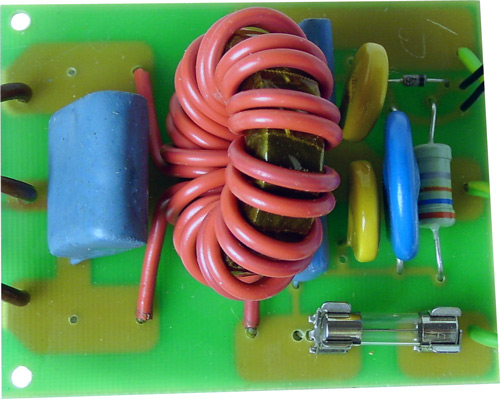
Just some eight to ten years ago, a surge protector, in the eyes of the majority of our fellow citizens, was exclusively a computer attribute. In those days, when purchasing such a device, the buyer studied its technical characteristics for a long time and carefully in order to choose the truly best one offered by sellers. At the same time, not much attention was paid to the appearance of the product, partly due to the fact that in those days most surge protectors looked almost the same. But, times are changing. And today, network filters are not at all an exclusively computer attribute, but have become common and familiar household device. The modern buyer is no longer so attentive and picky about clean technical specifications, as it was before. In addition, surge protectors in everyday life are mostly considered as extension cords with a bunch of output connectors and a switch, rather than as a serious device for filtering the supply voltage. Accordingly, the buyer’s main attention is focused on such parameters of the purchased product as ease of use, appearance, and functional equipment. It is from this point of view, in this material, that six network filters will be considered. I hope that this will help some people broaden their horizons and see that not all filters are the same and are just “a piece of wire with a box of connectors hanging on the end.”
According to the manufacturer, Pilot-S is economical solution to protect office electronics. In fact, the only thing this filter will do well is protect the user’s network from possible short circuits in the power circuits of the equipment connected to it.
The filter in question is primitive both outside and inside. The network cable, whose length is 1.78 m, ends in a simple, without any frills, case (size 373x47x46 mm). In turn, the case carries an illuminated power switch, a fuse reset button, and six connectors for connecting consumers. Five of them are quite modern, that is, with grounding. The sixth connector is without grounding and is made for compatibility with old-style plugs. All connectors are located almost close to each other, which is why the user may experience some problems. I mean the case when the equipment is powered by an external power supply whose dimensions, most often, exceed the dimensions of a conventional power plug.
Accordingly, when connecting such a power supply, the user will not be able to use the connector adjacent to it. In addition to this, the Pilot-S connectors do not have the so-called “child protection”. By the way, a child can also disassemble the housing of the filter in question without any problems. To do this, he doesn’t even need a Phillips screwdriver, because the case covers are fastened with ordinary furniture screws, the heads of which almost protrude beyond the boundaries of the case. Only one of them is recessed so that a plasticine seal, made in the best traditions of electrical instrument making of Soviet times, could be placed on top of it.
I hope that you can still convince your child that there is absolutely nothing inside the filter that deserves even a drop of attention. Actually, this is actually true, because in addition to the switch and fuses, the filter consists of one single container. We are not comparing the characteristics of filters now, but I think it’s not difficult to imagine how “serious” such a filter is.


I hope you have already sufficiently appreciated the Pilot-S in question. And, in my opinion, the last thing left to consider is the possibility of attaching this filter somewhere. For this purpose, its design includes two ears with holes. Unfortunately, the shape of these holes does not allow hanging the filter housing on an existing screw, for example, in a wall. That is, to attach the Pilot-S to any surface, you must first install it at the mounting location and only then secure it with a screw, screw, or whatever you will secure it with. The design of the case does not provide for any other options, which is sad.

This model is no longer as economical as the Pilot-S discussed above. The electrical circuit has become more serious and has grown to the LC filter that has already become traditional in such devices. True, the manufacturer still managed to save money. Instead of six output connectors, as was the case with the Pilot-S filter, in this case we have only five. Four of them are with grounding and one is without it. But, compared to the younger model, the location of the Pilot-GL connectors is more convenient for the user, since the universal connector (the one that does not have a ground) is spaced 11mm away from the others. Of course, not much, but if you include not very large external power supplies for the equipment, then the adjacent outlet will still remain accessible to the user.

Compared to the previous model, the Pilot-GL has improved not only electrical diagram filter, but also an indication. So, in addition to the backlit power switch, the Pilot-GL additionally has a green LED. It lights up if everything is in order with the device. If, as a result of an overload or short circuit in the filter, the protection is triggered, the LED will go out. At the same time, the power switch will continue to light, indicating the presence of voltage at the Pilot-GL input. I must say that this function sometimes turns out to be very useful.
This, in general, is where all the positive differences between the Pilot-GL and its younger brother end. Everything else, unfortunately, migrated from the younger model to the older one without any changes for the better. The network cable remained the same length (1.78m). The output connectors are not childproof. The covers of the device body are tightened with exactly the same screws as in the Pilot-S. True, there are two more ears for attaching the filter. But, the holes in them, just like in the Pilot-S, do not allow the filter housing to be hung on a screw or screw that is already screwed into, for example, a wall. In general, in my opinion, the Pilot-GL is certainly better than the simpler model described earlier. But final conclusions are still far away, and therefore let’s move on to considering the next filter.
The extension cord with chargers constantly gets in the way on the table or under your feet, collects a lot of dust, and also looks unaesthetic. Dealing with this problem is very simple: take a nice box, make a few holes in it and hide all the wires and cables there.


There are also ready-made solutions, such as Plug Hub from Quirky. This is a box made of hard plastic with a rubberized bottom. There are three holes on top for cables, and inside there are three fasteners that can be used to wrap cords that are too long. The Plug Hub can be placed on the floor or mounted on the wall.
 amazon.com
 2. Secure the wires under the tabletop
To secure the wires and extension cord under the table, you will need binders and screws (their length should be at least a quarter less than the thickness of the table top, otherwise they will go right through and the table will be damaged). First of all, attach an extension cord under the tabletop, preferably in the middle of the table or closer to the wall. Then secure the binders in the required places with screws. Connect everything you need to the extension cord and collect the wires with clamps. Visually the table has become much cleaner and neater.


There is a simpler option if you don’t need to hide a large number of wires. To do this you will need a construction stapler. To prevent the long wire from the lamp from dangling under your feet, carefully secure it with paper clips at the table leg. A small extension can also be secured with paper clips. For thicker wires, it is better to use special clamps (for example, these).


Stapler clips aren't your thing? Regular zip ties will do. Secure the wire to the table leg with zip ties. Wires that run along the floor can be covered with plastic or a board that matches the color of the floor. The extension can be secured under the tabletop using wide Velcro: secure it to the back of the tabletop with screws, and then attach the extension. To prevent the wires from dangling under the table, run them through cable channels - they can be purchased at any hardware store. You can fix the channels themselves with electrical tape or a regular plaster.
3. Organize your cable storage
Organizing them correctly will help you get rid of tangled wires. First, collect cords from phones, players, game consoles, and tablets throughout the house. Then take boxes (preferably prettier ones), place cardboard dividers inside them, label the location for each cable (so you don’t get confused later) and lay everything out neatly. To prevent the wires themselves from getting tangled, use regular cable ties.


If you don't want to deal with boxes, buy a basket and save up more toilet paper rolls.

If the wires don't bother you, you can simply attach a label to each one to make it easier to distinguish between them. For example, like this:

4. Keep all necessary wires at hand
We can’t hide all the cables in a box: we need some of them almost constantly. The solution is simple: secure them to the edge of your desktop so that if necessary, you can reach out and connect the device to the desired wire. Sugru will help us with this - plasticine-rubber and one of the most irreplaceable things in the household. Don't believe me? Then take a look.
Roll Sugru into small balls and secure them to a table support. Then use a utility knife to remove some of the plasticine (be careful, try not to deform the balls too much). Life hack: to prevent the plasticine from sticking to the blade, first rinse it with soapy water. Then adjust the shape a little with a sushi stick or toothpick to create neat hollows (they should be slightly wider than your wires). Everything is ready, you can fix the cables.


There is an option for those who know how to work with wood. A small block with holes will help organize all the wires on your desktop.


The simplest solution is to pass the wires through binders attached to the tabletop.
 hexjam.com
 5. Don't hide wires
Seriously, if you get creative with it, cables can be an interesting decorative element.
You are here now - home page - All about repairs:
When you are going to hang something on the wall, this is not a question at all!
You will need a hammer drill or impact drill. A couple of dowels. Level, hammer, tape measure.
If it is a shelf or a cabinet, then place it in that place and approximately mark the level of the hole. Well, then it’s quite simple, we measure the distance between the holes on the shelf or cabinet.
We mark the first hole, take a level and draw it, take a tape measure and set the distance. The intersection of the level line and the distance on the tape measure will be your second hole!
If there are several shelves or cabinets, then we do this:
We start either from the far right point or the far left point, drill, hammer in a dowel, tie a thread, and level it. In the place where a person holds the thread, it needs to be secured somehow. You can drill and attach it to a dowel only if the hole from the rough dowel is either hidden by a shelf or a cabinet.
An ordinary dowel 6 x 40 will withstand a minimum of 50 kg per cut in a concrete wall. I think that you won’t have more than 100 kg in one closet!
Why is all this, how to hang a shelf, or how to hang a closet, such a simple operation that it’s even somehow boring!
But here's what I wanted to tell you about.
How to hang it accurately the first time?
How to hang something whose holes are not directly accessible!?
Imagine a situation where you measured, hammered a nail, and didn’t hit the right size for various reasons, but it’s impossible to drill next to it!?
Has such a situation ever occurred!?
Since I worked a lot in construction and as a carpenter and joiner, I had to see a lot!
And often this very situation turned out to be practically unsolvable the first time!
But there is a way that is ingenious, like all the simplest things! And I remembered this method when the need arose to hang an extension cord!
Hang your computer extension cord on the back of your desk the first time and exactly where you need it! The top tabletop extends slightly beyond the backsplash, which is why we have a stopper!
We need to make a template.
1. Select self-tapping screws so that they fit freely into the hanger hole.
2. In this case, I had thin cardboard lying around.
ATTACHING THE EXTENSION
It is more convenient than a simple sheet, because the screws will hold better there.
3.Insert the screws and move them to the extreme point of the hanger,
4. Take the cardboard and, aligning it along one side, press on the cardboard so that the screws appear on our side.
5. We take out the cardboard with self-tapping screws and place it in the place where our object should be located, in this case the extension cord.
6. We wrap the screws, tear out the cardboard, and adjust the screws to the height.
7. Attach the extension.
This is what we got, quickly, simply, accurately and right the first time! The story turned out to be 10 times longer than the process itself!!!

How to hang up a router.
Using absolutely the same technology, we will attach the router in the place where it is needed on the back panel, or on the wall, but the first time.
In this case, ordinary paper was used as a template!

Here is our router hanging on back cover table! Very simply cheap and cheerful!

Before installing electrical wiring in new apartment or before replacing the wiring during a major overhaul, any owner is faced with a choice of how many and what kind of sockets he needs to install in each room. IN modern apartments sockets are rarely installed one at a time; usually two, three, and in some cases even four electrical sockets are placed side by side. For example, at a workplace with a computer it is better to install 3-4 sockets, otherwise you will not be able to do without an extension cord.
Practice shows that there are never too many sockets. If we need to install two sockets side by side, then we have the choice of installing two single electrical sockets in a two-post frame or one double electrical socket. The Florence series features double rosettes and multi-post frames, so both options can be implemented. What to choose?


- Double sockets are designed to instead of one old socket it was possible to install one double socket into the existing socket box.
Ideas for the home: how to hide wires
This allows you to double the number of sockets when renovating an apartment. This is why double sockets were developed.
- The price of a double socket is less, than the price of two single sockets in a two-post frame, let’s see this using the example of white or beige sockets from the Florence series.
1. Price calculation for two single sockets in a two-post frame
2. Calculation of the price for an alternative option - for a double socket

You can install the wiring so that powerful electrical appliances are connected to each single socket, i.e. so that a current of up to 16 A flows through each. But for this, it is necessary that the sockets are either powered through two separate lines with cables of a standard cross-section for connecting sockets (2.5 mm2), or powered in series through a cable of a larger cross-section. As a result, it is possible to ensure that the total maximum current, which can flow through two single electrical outlets would be 32A. This cannot be done by installing a double electrical outlet.
To summarize, we can say that double sockets are indispensable if we are faced with the task of increasing the number of sockets in pre-installed socket boxes. This is mainly true when replacing sockets in the process of cosmetic repairs, if the wiring is not replaced with the installation of new socket boxes. Single sockets under a multi-post frame look more aesthetically pleasing than double sockets and give greater freedom of choice. This option is suitable for overhaul apartments with replacement of wiring or for furnishing an apartment without finishing in a new building.
In Ideas for the home: how to hide wires
Unfortunately, wireless technologies have not yet become commonplace in offices and homes. This means that the pile of annoying wires on the desk won’t go away anytime soon. I'll tell you a few tricks to help you get rid of clutter and hide cables from prying eyes.
1. Hide the extension cord with chargers in a box
 *
*
The extension cord with chargers constantly gets in the way on the table or under your feet, collects a lot of dust, and also looks unaesthetic. Dealing with this problem is very simple: take a nice box, make a few holes in it and hide all the wires and cables there.
2. Secure the wires under the tabletop

***
To secure the wires and extension cord under the table, you will need binders and screws (their length should be at least a quarter less than the thickness of the table top, otherwise they will go right through and the table will be damaged). First of all, attach an extension cord under the tabletop, preferably in the middle of the table or closer to the wall. Then secure the binders in the required places with screws. Connect everything you need to the extension cord and collect the wires with clamps. Visually the table has become much cleaner and neater.
There is a simpler option if you don’t need to hide a large number of wires. To do this you will need a construction stapler. To prevent the long wire from the lamp from dangling under your feet, carefully secure it with paper clips at the table leg. A small extension can also be secured with paper clips. For thicker wires it is better to use special clamps.

Stapler clips aren't your thing? Regular zip ties will do. Secure the wire to the table leg with zip ties. Wires that run along the floor can be covered with plastic or a board that matches the color of the floor. The extension can be secured under the tabletop using wide Velcro: secure it to the back of the tabletop with screws, and then attach the extension. To prevent wires from dangling under the table, run them through cable channels - they can be purchased at any hardware store. You can fix the channels themselves with electrical tape or a regular plaster.
 *
*
3. Organize your cable storage
Organizing them correctly will help you get rid of tangled wires. First, collect cords from phones, players, game consoles, and tablets throughout the house. Then take boxes (preferably prettier ones), place cardboard dividers inside them, label the location for each cable (so you don’t get confused later) and lay everything out neatly. To prevent the wires themselves from getting tangled, use regular cable ties.

***
If you don't want to deal with boxes, buy a basket and save up more toilet paper rolls.

4. Keep all necessary wires at hand
We can’t hide all the cables in a box: we need some of them almost constantly. The solution is simple: secure them to the edge of your desktop so that if necessary, you can reach out and connect the device to the desired wire.
 Are there mites in Pitsunda? Ticks in Abkhazia. Pitsunda pine grove
 Red viburnum (Viburnum opulus L
 Nail Making Business How to Make Copper Nails
 Stone grill: material features and manufacturing options
 Blackroot medicinal cultivation
 Fuel cells: a glimpse into the future
 Houses with a hipped roof projects