How to make a potbelly stove with your own hands drawings. Long-burning stoves without grates: do-it-yourself potbelly stove. Simple and convenient chimney
The potbelly stove is an iron, compact-sized stove with a chimney at the top. It consists of a chamber where solid fuel is poured, a grate in the form of a metal grate, a pipe - a chimney and an ash pan for collecting ash.
With the ability to handle the welding machine, the device is easy to manufacture, and at the same time, it will serve faithfully in an unheated room, in the field, in the absence of central heating for more than a dozen years.
How to do it yourself?
Manufacturing options:
Rectangular oven
It is a metal box, you can independently weld the structure of steel sheets. For a rectangular potbelly stove, an old automobile tank, a box will fit perfectly.

Usually, this form is chosen when it is necessary to cook food on the stove.
On a capacious platform, you can immediately put 2 large pots or containers for heating water.
The manufacturing principle is simple: doors are built to cover the blower and the combustion chamber, a hole is made for the chimney, combustion products must leave the room in a timely manner, otherwise you can inhale carbon monoxide.
From a gas bottle
The most common type of potbelly stove. The cylinders have thick walls, the furnace is durable, mobile, fireproof.

First, a drawing is drawn, markings are made. The door for the combustion chamber will be located in the center of the cylinder. It blew in the same plane, only 10-12 cm lower.
Instruction:
- We take a grinder, cut out both doors, draw a closed line between them.
- Along the line we cut the balloon into 2 parts.
- At the bottom We weld the grate - blower.
- Install grate, weld both parts again.
- for valve make a hole with a radius of 10 cm.
- for hood we insert a hole into the pipe, by welding we weld objects.
- simple stove from the cylinder is ready, you can use it, throw in fuel and check its operation.
For cooking on the top of the stove, the design is slightly different:
- cut off the top of the balloon.
- Inserted inside and welded rods.
- Side top cut a hole for the pipe. You can heat and cook food at the same time.
- Welded hole, the valve is screwed in, a comfortable handle adapts.
- From a pipe, barrels can also be done oven. The barrel or pipe must be selected according to the diameter.
- At the bottom of the barrel pipes cut 2 holes for the firebox and ash pan.
- Make doors.
- Do framing metal strip holes.
- Under the furnace door at a distance of 10 - 12 cm inside the barrel, weld brackets at the corners, a grate will lie on them, weld it first from any fittings.
When making a furnace from a pipe, weld the bottom of it, as well as a part on top:
- Down to the bottom weld 4 legs.
- On a surface cut a hole, weld a pipe to it, this will be a chimney.
- Weld hinges to the previously cut holes, install the doors. Also, mark and attach a hook so that the doors lock tightly.
- For design aesthetics finish all welding seams, clean them 10. Paint the outside of the device with heat-resistant paint. Whatever a factory product, you can sell or successfully use it yourself.
Working furnace
The option is distinguished by a specific smell, which during the combustion of fuel will be emitted by oil mining, even in the presence of an exhaust hood.
Instruction:
- To make this model, pick up sheet material at least 4 mm thick, a chimney pipe, individual small structural elements.
- Do it on a sheet accurate markings of all elements, having previously drawn a drawing.
- embed all elements with a grinder, clean the edges of the parts. Drill round holes in the pipe.
- Top of the tank cut the pipe hole off-center to the left.
- Shifted to the right on the circumference, drill a hole for the connecting pipe.
- Got 2 circles, weld them to the pipe, the thickness of the upper tank will depend on its segment.
- Decorate the bottom part of the stove in the same way., but now cut the hole right in the center of the marked circle.
- cut next second hole, attach the sliding cover to it.
- Weld to the bottom plane 4 legs.
- Clean seams after welding, paint the surface with high temperature resistant paint.
- Connect the chimney to the oven. The processing will be poured into lower part tank, after igniting the paper, the sliding cover closes, and mining starts to burn. Oxygen will penetrate through the holes, mining will burn intensively.
Necessary materials, tools
Before starting work, prepare the tools:
- metal brush;
- chisel, pliers, hammer;
- tape measure, chalk;
- drill with drills for metal;
- grinder;
- circles for metal;
- welding machine;
- protective mask;
For the case you will need a pipe 30 cm in diameter, at least 5 mm thick. You can use sheet metal of the same thickness instead of a pipe.
For the chimney, you should choose a pipe 12 cm in diameter, at least 3 - 4 mm thick. To avoid burning out, a metal box is suitable for the ash pan, so you need to choose a durable sheet metal.
Walkthrough
First you need to cut the metal, taking into account the thickness and length of the desired blanks.

Chamfer parts from parts, the touch to the furnace will be safer, and the welding seams will be strong:
- Check the correct markings of the parts before you start cutting them. When cutting, consider the thickness of the walls of the furnace, also the circle.
- Bevel the prepared parts to prevent accidental contact with the hot device.
- Check all part markings.
The design is installed in the following sequence:
- Connect welding machine to the network.
- Take electrode with a thickness of 4 - 5 mm, taking into account the sheet or pipe.
- Install current strength on the device up to 160 A.
- put on special glasses and overalls, protect your hands with leggings.
- To the bottom of the oven weld three walls.
- Bottom of device place at least 5 cm from the floor.
- Connect parts at right angles. Check their perpendicularity with a level.
- Where needed, straighten the corners of the details.
- weld details and joints relative to the floor level, at an angle of 45 gr.
- weld a partition between the blower and the firebox, having previously cut holes so that ash does not accumulate.
- withstand the distance between the holes is at least 5 cm from the walls of the stove. The distance between the partition and the bottom of the structure must remain at least 10 cm.
- Lastly by welding, cut holes for installing a chimney on the rear panel homemade stove.
- Make markings, drill rectangular holes in the places intended for the firebox and blower.
- Align with baffle all bottom holes. The distance between the walls of the furnace and the upper side edges should be at least 3 - 5 cm. The opening for the blower is slightly smaller, but not more than 5 cm.
- Bulgarian cut two holes from metal, form doors. Weld them on the canopies, raise the blower to the maximum to the top of the slab opening so that they do not sag further under the influence of high temperatures.
- To the doors weld bolts, they should open and close easily, without obstacles.
After all welding work, check the quality of the seams, tap them. If there are defects, correct them immediately. At the end of the work, weld the upper part of the device.
How to make a potbelly stove of long burning?
In order for the potbelly stove to radiate heat for as long as possible without throwing another portion of firewood, it does not burn out quickly, it is possible, the fuel will not burn, but smolder, the heating process without laying firewood can be extended for several hours.

Making a furnace for long burning slightly different from the usual design.
A balloon is best suited for the furnace:
- Cut off the top of it, this will be the lid of the stove.
- Punch a hole at the top and side of the stove, this will be the hood.
- Punch a hole in the center so that the balloon can be easily inserted.
- weld to the cut hole of the pancake pipe, a little longer than the cylinder. The pipe will serve as a blower, and oxygen will flow into the furnace, the fuel will not smolder, but will not burn.
- cut off part of the balloon in the center, insert the pipe into the hole as a blower. The principle of operation of a potbelly stove for long burning is to create pressure inside the chamber. After the firewood flares up, a heavy metal circle sinks inside, begins to put pressure on the fuel, creates pressure on it, the fuel begins to experience a lack of oxygen and slowly smolder. The smoke, heading up, goes out through the chimney, the room will not be smoky.
Advantages and disadvantages
 Like any other heating device, the stove has both pros and cons.
The undoubted advantages of a homemade oven are:
- Compact dimensions.
- Use of any available fuel, you can heat with peat, firewood, sawdust, wood chips, coal.
- Insignificant costs for the manufacture of the device, basically you can get by with handy materials.
- Construction installation does not require laying the foundation, chimney.
The disadvantages of the oven include:
- Quite a large expense fuel material, the principle is as follows: while you are drowning, it is warm. To keep the room cool, you need to throw fuel more often, otherwise you can just freeze.
- Furnace walls become very hot and may result in burns if touched.
- Should not be allowed coals falling out of the oven, this is fraught with fire.
Where can it be applied?
Furnaces were popular in the first half of the last century. They warmed the soldiers' dugouts, dugouts, and heating wagons.
Today, stoves still heat garden houses, garages, warehouses, greenhouses, that is, where there is no gas pipeline, and electrical appliances are inefficient, while burning a lot of electricity.
Types of homemade bourgeois
The material for the construction is cast iron or stainless steel. The furnace consists of a container, an ash pan, a branch pipe, a chimney, a furnace door.
The types are distinguished:
- pyrolysis ovens;
- with a cooking platform at the top for cooking;
- furnaces sheathed with a casing for efficient heat transfer. For homemade, you can pick up an old cylinder, a barrel, a large vat, a can. Furnaces can be cylindrical, rectangular;
Installation safety rules
Any home-made heating device is designed to heat the room, making it more comfortable, but along with this, such devices are far from safe, fraught with ignition, fire.

When installing the structure, it is very important to follow the safety rules:
- Bake must be installed on a surface that is resistant to fire, otherwise the floor may burn through. For this, it is good to lay bricks and tiles on the floor.
- The walls of the stove should not overheat much; for this, special drywall or other non-combustible material is used in the manufacture.
- Fast flammable materials do not put near the firebox, they can catch fire.
- take care about ventilation in the room where the potbelly stove will be located. Carbon monoxide should be released in a timely manner, and not accumulate inside the room.
- use in production only high-quality, refractory material.
- In the presence of panel, wood walls in the house install the oven at a distance of 1 meter from them.
- Be sure to mount chimney preferably from one section.
- When running a pipe through a wall install a brick thermal barrier. Do not use concrete for these purposes, it crumbles quickly.
- for garage better fit the potbelly stove is being worked off, so do not rush to throw out car rims from the wheels.
- Don't put the oven near flammable materials.
- pipe section just above the roof, make it from non-combustible material, so the stove will cool down much more slowly.
- Think well ventilation system, the room should not be burning.
- Lay out the floor and walls near the structure with a brick, or facing material, the stove is fire hazardous The same applies to the chimney, the distance to the walls and ceiling must be at least 1.2 meters.
- Install for safety metal guard around the device.
- grate it is better to make it from cast-iron grates in a set, so it will be easier to pull them out of the furnace.
- Install all parts of the chimney only at the top of the structure, they must withstand high temperatures over 300 degrees.
- Work the seams after welding with a durable and high-quality sealant.
- Do not brush the pipe, metal objects, the pipe walls can quickly leak.
- Mounting the chimney, make a rain visor, rain moisture will not get inside the pipe.
Often homeowners prefer to assemble simple and useful homemade from improvised and unnecessary materials, instead of buying ready-made. And the potbelly stove is one of such useful devices.
The main feature of the potbelly stove is that it heats up as quickly as it cools down. Therefore, the scope of its use is narrowed mainly to those rooms where it is necessary to provide fast heating, while the appearance of the device for the user is often completely unimportant.
A do-it-yourself stove-stove can be made, and if desired, upgraded to achieve more efficient heat transfer.
Have you also thought about assembling such a homemade product and do not know where to start? We will help you in the implementation of the task - the article describes the assembly order various options homemade ovens, drawings and diagrams are given.
Also discussed in detail are ways to improve a home-made potbelly stove, as a result of which the efficiency of the stove will become noticeably higher.
The choice of furnace design depends on what material is used as fuel. Each user himself determines the degree of its availability and economic feasibility.
It is the combustible material, which has different temperatures and the nature of combustion, that dictates the principles for creating various modifications of the device.
The shape of the potbelly stove may be different, often it depends on the availability suitable material. It can be an old can, a gas cylinder, a metal container - everything that is at hand. The main thing when choosing it is the thickness of the metal and the shape, which requires a minimum of alterations.
Image Gallery
In the lower part of the chamber, a grate is placed from the grate (it can be welded from reinforcement), under which ash will accumulate. You can also organize the hob. It is easier to do this on a horizontally located cylinder by welding corners on it on both sides.

Well, if the barrel initially has legs. If not, you need to weld them or install the stove on bricks.
A potbelly stove from a gas cylinder can also be used as a basis for the further construction of a hot water column, as it is also called - "Titan". To do this, a stainless container is installed on top of the stove, through which the chimney pipe passes.
The water in a wood-burning boiler heats up quickly, and little firewood is used - in the summer, one bookmark in a small firebox is enough.
A metal container with walls at least 3 mm thick is also suitable for a potbelly stove. The open top of the container is closed with a circle of metal sheet and brewed.
A hole is cut in the lid or wall for the chimney. Its diameter should be at least 100-150 mm. The top in such a potbelly stove will heat up so much that it will be possible to cook food and heat water on it.
We also have more detailed instructions with diagrams and drawings for manufacturing.
Features of a stove on sawdust
If there is no shortage of sawdust on the farm, then this type of fuel will fully justify its use. Such a potbelly stove does not require frequent loading - compacted sawdust inside does not burn, they slowly smolder, releasing thermal energy gradually and providing heat for a long time.

Do-it-yourself potbelly stove on sawdust works on the principle of long burning. The slow combustion process allows you to save resources - heat does not fly out instantly into the chimney, heating the atmosphere
The basis of the furnace can be a metal barrel with an open top (if the container is airtight, then the top is cut off) or a pipe with a diameter of 300 to 600 mm.
Then a metal circle is cut out of a sheet, three or more millimeters thick, which should be smaller than the inner diameter of the barrel. In its middle, a hole with a diameter of 100 mm is cut under a cone for ramming sawdust.
The workpiece is welded to the walls of the barrel. With the help of this circle, the ash pan is fenced off - in it, with the help of chips or chips, ignition will be carried out. The height of the ash pan should be 100-200 mm.
A window is cut out below the welded circle, which will serve as a blower. Curtains are welded to the cut piece of metal, making a door for the same hole.
In the lid of the container make an exit to the chimney. The lid should fit tightly on the potbelly stove and be made of a sufficiently thick sheet, otherwise it will quickly burn out.

In order for the sawdust to burn gradually, it is necessary to provide a limited supply of oxygen to the fuel compartment. To do this, a cone-shaped core is inserted inside the firebox, sawdust is poured around it and rammed. The cone is carefully removed, scrolling, put a lid on the barrel
You can improve the same model by adding an additional cylinder. In this version, sawdust will be in the inner chamber, and the space between the two compartments will serve to burn gases and increase the heating area. In this embodiment, the exit of flue gases is arranged in the lower part of the stove.
How can a potbelly stove be improved?
An ordinary potbelly stove has a lot of positive qualities, but also has many significant drawbacks. She is unable to accumulate heat and heats the room while the fire is burning. Requires continuous fuel supply, on average - every 30-40 minutes.
In addition, a large amount of heat flies out through the chimney into the atmosphere without benefit. That is why work on improving the potbelly stove is carried out without stopping.
The standard design of the potbelly stove has many modernized designs that allow you to:
- save fuel;
- increase the efficiency of the stove;
- increase heat capacity;
- reduce the frequency of refueling.
The most common methods for improving the efficiency of a potbelly stove are the creation of a slow burning mode, a gas afterburning system, and the installation of heat-resistant lining of the inner walls.
You can also improve the quality indicators of the stove by increasing the heat transfer area with the help of welded pipes and an installed fan that will drive air flows through them.
The industrial model of such a potbelly stove is called Buleryan, but besides it, there are many more various designs made in a handicraft way. We recommend watching a detailed master class on homemade production.
You can increase the heat transfer time by lining the oven with brickwork. Such a potbelly stove will heat up more slowly, but it will also give off heat longer, maintaining the temperature in the room for some time after the fire has died out.
Are you interested in brickwork? We have a detailed do-it-yourself manual with diagrams and drawings on our website.
Option # 1 - an oven with an increased fuel load
This model is designed to increase efficiency and continuous burning time. They take as a basis a horizontal rectangular potbelly stove on massive, stable legs and supplement it with a cassette from a deaf sealed cylinder. Such constructive additions significantly increase its efficiency.
A flange is welded to the cassette cylinder with a height of about 400 mm. After installing the cylinder in the burner hole, its edge should fall 5-10 mm below the stove. To make it convenient to install and remove the cylinder, handles are welded to its body.

The cylinder is filled with firewood in such a way that there is some space between them and when it is installed on the stove, they can immediately fall on burning coals
How does a potbelly stove work:
- The lower part of the firewood, having fallen on the coals of the pre-ignition, flares up. In this case, the upper part, located in the cassette, will not burn due to a lack of oxygen, but will be dried under the action of hot smoke.
- Under the weight of its own mass and as it burns, the firewood gradually sinks into the firebox.
- The hot gas, which has been in the cylinder for some time, gives it heat, thereby increasing the heat transfer area in the room. In this case, the cylinder cover can serve as a cooking surface.
- At the same time, the temperature of the outgoing smoke decreases, which means that the heat capacity and efficiency of the potbelly stove increase.
As a result of such modernization, the time interval between laying firewood increases and the efficiency of using the stove increases.
Option # 2 - long-burning potbelly stove "Bubafonya"
The low efficiency of an ordinary potbelly stove is a fact that has long been known and verified by many users.
One of the methods to increase it is to slow down the combustion process by limiting the flow of air into the combustion chamber. This improvement can be found in such stoves as "Bubafonya", "Filipina".
Use this model of a potbelly stove in non-residential premises - workshops, greenhouses, and other outbuildings. For work within 9-12 hours, one bookmark of small firewood, chips, sawdust is enough. In this model of the heating device, coarsely chopped and damp firewood cannot be used.
Potbelly stove can be created from any metal tank. Most often they use a barrel of fuels and lubricants or an old cylinder.
Production is carried out in the following sequence:
- A combustion chamber is prepared from an accessible cylindrical container, in the upper part of which a hole is cut out for the chimney.
- From metal (at least 10 mm in thickness), a circle is cut out, slightly smaller than the inner diameter of the barrel.
- A hole with a diameter of 100-150 mm is made in the center of the circle (the exact size depends on the diameter of the pipe used for the rod).
- Ribs up to 50 mm high are welded onto one of the planes of the circle.
- A pipe is welded to the center of the circle. Its length is calculated in such a way that the piston in the lowered state rises above the tank cover by approximately 100 mm. If you leave the pipe longer than necessary, draft will appear in it, it will begin to smoke.
- Next, they construct a lid that will fit tightly on the barrel and cut a hole in it suitable for the piston pipe
You can further increase the efficiency of this model by organizing the flow of air into the furnace from the street. Thus, the heated air from the room will not fly out into the chimney.
Option # 3 - Filipina secondary afterburner
In the operation of the furnace, two methods were used to increase its efficiency, based on the principles of long-term combustion and pyrolysis. For its manufacture, you will need two gas cylinders, which will serve as chambers for primary and secondary combustion.
The sequence of steps for making a potbelly stove is as follows:
- Cylinders are prepared for work by releasing the remaining gas from them and filling them with water. Without this procedure, it is absolutely impossible to cut them, otherwise the sparks that form during the operation of the grinder can provoke a gas explosion, some of which always remains in the cylinder.
- In the first cylinder, which will serve as a chamber for the furnace and ash pan, the tap is removed and the top is cut off (it is used to make a door), a hole is cut out for installing a chimney.
- Opposite the hole for the chimney, a pipe is welded, the other end of which should not rest against the cover of the second chamber, leaving free space for smoke to escape.
- At the outlet of the pipe from the first cylinder, a metal ring is welded, it will serve as a support for installing the upper cylinder. Holes are drilled in it.
- A metal ring is also welded to the second cylinder in the place where the top is cut, in which the places for the holes are marked, focusing on the holes already made in the first ring.
- Before finally installing the second cylinder, an air supply pipe is inserted into it.
- The upper chamber is put on the pipe, aligning the holes, a heat-resistant tourniquet is wound between the rings, and the connection is fixed with screws.
- The chimney outlet is made from the bottom of the secondary afterburner chamber.
To obtain a stable structure, reliable legs are welded to the lower chamber. Install awning doors. It can be further improved by adding the ability to regulate the air entering the furnace.
The device of the potbelly stove is quite simple. When a combustible material is ignited in a closed space with air inflow and smoke removal, the walls heat up and heat the room. The simplest oven should have three elements:
- combustion chamber;
- a door with air channels for the inflow of fresh air;
At the same time, for the most efficient operation of the stove, you need to follow many points:
- the ratio of the dimensions of the structure;
- the possibility of regulating the air flow;
- the correctness of the chimney scheme;
- complete burnout of fuel, etc.
How to make a potbelly stove with your own hands, so as to take into account all the necessary points for its most effective work? This requires an accurate thermal calculation. You no longer need to carry it out, since the drawings include all the exact dimensions.
Main technical requirements
A potbelly stove is the name of a stove, implying an accurate heat engineering calculation. The dimensions directly depend on the dimensions of the combustion chamber. If the pipe is too wide and passes all the accumulated gases, then, in addition to smoke, there will be leave and warm, as well as a large volume of completely unburned materials, as a result of which the oven will not warm up.
The width of the pipe must be such as to create resistance. According to calculations, the number indicating the diameter of the chimney in millimeters should be exceed 2.7 times number indicating the volume of the combustion chamber in liters. For example, if the volume of the chamber is 25 liters, then the diameter of the chimney should be 65 millimeters.
How fuel burns in a stove
Despite the grates through which the ash falls to the bottom of the firebox that has almost cooled down, heat is still transferred to the lower part of the tank. Because of this, potbelly stoves are usually put on legs. sufficient height according to the drawings, and they lay under the furnace, most often asbestos, on top of which a sheet of metal is laid, exceeding the size of the furnace along the perimeter by 35 centimeters, as in the video. The potbelly stove should be located at a distance not less than 1.2 meters from the walls of the room.
Read also: How to make a potbelly stove for giving
The most dangerous part of the furnace considered a chimney. The hottest gases are concentrated in it, which can continue to burn, which is why the chimney is constantly hot, when assembling it, you need to check the drawings more often.
Additional modifications
 Currently, potbelly stoves can run on any type of fuel, be it solid, liquid or even gaseous. Depending on the type of fuel, grate bars are added to the design of the potbelly stove. gratings, blowers, etc.. After watching the video, you can familiarize yourself with many of them, and then find the drawings of anyone who is interested. The stove is capable of burning even coal. By adding guides inside the firebox, the potbelly stove can even be used as a stove for cooking.
If the grates are made removable according to the drawings, then the furnace can have two combustion modes. It is possible to assemble a universal blower with a removable nozzle, and, in this case, it will be possible to use three different types fuel depending on the position of the blower and additional details from different drawings.
The use of bourgeois
 When considering heat engineering and fire safety, nothing limits the master in creating a potbelly stove of any kind and any shape. Many Canadian, Finnish and Swedish industrial manufacturers have thought about how to make potbelly stove attractive, and as a result, they produce similar stoves in an amazing design - with this design they can be placed in country houses as item interior instead of a fireplace.
By the way, the fireplace in the assembly is more complicated, it requires many costs, as well as approval of the drawing of the installation project. When placing a potbelly stove, no approvals are required, since such stoves are not considered a stationary element. As you can see from the video, a lot of craftsmen, and workshops using such stoves, and each homemade potbelly stove has its own schema.
Read also: Potbelly stove from rims
Varieties of efficient stoves
For it is possible to increase the efficiency of the stove. She keeps longer gives off heat better compared to metal. The use of water can only be limited by your imagination - you can simply put on top of potbelly stove a tank of water (and use it for domestic purposes), weld water channels or pockets to the sides of the structure, completely wrap the stove and chimney around the perimeter with a metal tube and let water through it, as in the video. These tubes can also be around the perimeter of the room. For most options, drawings are also already available.
Cast iron potbelly stoves
Such stoves keep heat for a very long time and are able to work not only on wood, but also on everything that burns. Most often thick-walled potbelly stoves used by the military on campaigns. The design is considered the most reliable, it never burns out, thanks to its "omnivorous", very economical and indispensable for good space heating. But it is not suitable as a stove for boiling water, and it is unlikely that it will be possible to make one at home.
The longest burning
 Engineer Bystrov created a long burning design. Such potbelly stoves have a top load, there is no grate in it. These ovens are often used in smokehouses, for drying walls, drying workers' clothes. The burning of sawdust to complete burnout in a furnace assembled according to this scheme can last 19 hours. Also, a sufficiently long burning time can be obtained with using wood as fuel.
The main difference between a wood-burning stove is that they can operate in two modes, which can be found on the video. If the room needs to be heated quickly, the ash pan should be pulled out a few centimeters, opening the gate fully. The second mode is used to save the temperature in the house or in the country in one place with long burning fuel. In this mode, the wood will burn much more slowly, use very little oxygen, and produce more heat than with a conventional stove.
Workshops and other household premises are forced to look for simple and cheap ways to heat them. In the era of inexpensive electricity, there were no problems with this - it was possible to use an elementary heater assembled from a piece of asbestos pipe and a nichrome spiral. Today, the operation of even an economical IR heater will cost a pretty penny, and it’s better not to remember the voracious handicraft equipment at all.
The way out of this situation lies on the surface - it is enough to make a potbelly stove with your own hands. Craftsmen have developed more than a dozen simple and efficient designs designed for the use of liquid or solid fuels. If your choice is a heater that runs on wood or wood waste, then there is no better design than a potbelly stove for long burning.
Secrets of long-term operation of solid fuel units
The whole secret of long-term burning of a potbelly stove is hidden in the way fuel is put into it. Firewood in such a stove is set on fire from above, so there is no danger of simultaneous ignition of all the logs laid in the fuel chamber.
Despite the unpretentious appearance, a home-made long-burning potbelly stove successfully competes with many factory-made wood-burning stoves.
Additionally, this is facilitated by the method of air supply. The oxygen necessary for combustion is supplied only to the top layer of the fuel. Such solutions make it possible to increase the size of the bookmark as much as the dimensions of the furnace allow. Of course, the time of continuous operation of such units increases tenfold.

The secret of long burning stoves is effective method fuel combustion
The pyrolytic decomposition of solid fuel, which occurs at high temperature and lack of oxygen, allows to further increase the duration of one heating cycle. At the same time, firewood does not burn, but smolders, simultaneously forming a large amount of volatile hydrocarbon compounds. Pyrolysis gases burn under the roof of the furnace with the release of a large amount of heat. Thus, smoldering contributes to the lengthening of the continuous burning period, and pyrolysis makes it possible to increase the efficiency of the heat generator many times over.
Another option for long-burning stoves is Bubafonya. You can make it yourself at home. Our next article provides a diagram and step-by-step installation instructions:.
The device and principle of operation of a potbelly stove for long burning
The methods described above for increasing the time of continuous operation of the furnace have been successfully implemented in the design of the potbelly stove, which we offer for manufacturing. The unit consists of only a few parts and is distinguished by its extraordinary simplicity, which, however, does not prevent it from successfully competing with more complex heating devices.
Firewood is laid in the body, which is most often made in the form of a cylinder. From above, the fuel is pressed by an air distribution device in the form of a hollow rod with a piston (a heavy metal disk, in the center of which there is a hole for air supply). Support vanes (blades) are welded to the bottom of the steel plate, the width of which determines the height of the gap between the fuel and the piston. In other words, the volume of the combustion chamber depends on the size of the blades. A pipe is welded to the back of the disk, through which air enters the furnace. To regulate its amount, the channel can be completely or partially blocked using a sliding damper.

The device and principle of operation of a potbelly stove for long burning
A pipe for connecting a chimney is cut into the upper part of the potbelly stove body. To ensure normal traction, the height of the pipe must be at least 4 m. From above, the unit is closed with a lid, which has an opening for the air distribution device.
Primary air is supplied directly under the piston, which divides the working space into two chambers. Precise dosing of oxygen makes it possible to reduce the intensity of the flame, facilitating the transition to the gas generation mode. At the same time, thermal energy is released not only by burning fuel, but also by pyrolysis gases, which are actively afterburned under the cover. Secondary oxygen for their oxidation is supplied through a special window in the upper part of the furnace, and in the simplest case - through the gap between the air supply pipe and the top cover. After the top layer of firewood burns out, the metal disc lowers under its own weight, providing oxygen access to the new fuel horizon.
The products of combustion are removed from the furnace through a chimney cut into the upper part of the body. In order to further increase heat transfer, chimney attached to the heater through a small horizontal transition, which plays the role of an air heat exchanger.
What you need for work: tools and materials
This model of a "long-playing" stove can be made in just a few hours. All that is needed for this is a great desire and the correct organization of the workflow. You will also need to thoroughly understand the design of the unit and prepare everything you need in advance.
Of the tools you will need:
- welding machine - a small, lightweight inverter with the ability to adjust the current strength up to 200 A is best suited for these purposes;
- angle grinder (colloquially a grinder or "grinder");
- cutting and grinding discs designed for metal work;
- drilling machine or electric drill;
- set of drills;
- hammer with a medium-sized striker;
- blowtorch;
- chisel;
- sledgehammer;
- tape measure and metal ruler;
- core (device designed for applying marks to facilitate drilling);
- scriber for marking on metal surfaces.
As for the materials, there is no need to follow the list exactly. All the charm improvised designs just lies in the fact that any iron that can be found in the backyard or in the corners of the garage (workshop) will go for them.

For the manufacture of the furnace body, any overall container is suitable, for example, an unnecessary metal barrel
So, the list of necessary materials:
- steel pipes with a diameter of 80 to 250 mm, which will be needed for the manufacture of an air supply riser and a chimney;
- a suitable metal container with a diameter of 300 to 600 mm with a wall thickness of at least 2.5 mm (you can use a gas cylinder that has served its time, a fuel barrel or a pipe length of at least 120 cm);
- a metal sheet with a thickness of at least 4-5 mm, from which the air distribution piston will be made;
- strong metal hinges that will be needed to fasten the furnace and ash doors;
- asbestos cord (it is needed to seal the loading window and other operational openings);
- corners with a shelf from 50 mm, channels and profile pipes - for the manufacture of air distributor blades, support legs and other structural elements;
- a round metal pancake with a thickness of at least 5 mm and a diameter of 120–150 mm (you can take any suitable gear or sprocket from automotive equipment);
If the heater is planned to be equipped with a water jacket, then additionally prepare sheet steel with a thickness of at least 2 mm and pipes for connecting the liquid circuit to the heating main (hot water supply).
Branch pipes are also used when assembling a potbelly stove with a water circuit. Step-by-step instruction given in our article:
How to design a potbelly stove for long burning: diagrams and drawings
Any suitable container can be taken as the outer casing of the pyrolysis burning potbelly stove. The use of waste materials will make it possible to obtain a heater with almost zero cost. The only thing that needs to be done is to design all other structural elements in accordance with the dimensions of the selected case. This will make it possible to build not only a cheap, but also a productive, economical furnace.
To determine the dimensions and parameters that affect the performance and thermal efficiency of the potbelly stove, you can use a special scheme. To make a calculation, starting from the dimensions of the found container, it is necessary to measure its diameter (D) and height (H). These will be the external parameters of the heater.

The scheme for calculating a potbelly stove for long burning will help to adjust the parameters of parts depending on the size of the base
Complete Calculation Method:
- The ratio of diameter (D) and height (H) of potbelly stoves should be within 1:3(5). In a stove that is too narrow and high, the afterburning zone of the combustion products will be stretched in height, which means that some of the gases will not be able to ignite in time and simply go into the pipe. If you build a low and wide unit, then the surface combustion will be too uneven. Air is supplied to the middle part of the bookmark, so the fuel there will burn out much faster than at the edges. This will lead to the formation of a depression in the center of the bookmark and the piston hanging on unburned residues near the walls. At the same time, there can be no talk of any normal operation, and even more so of pyrolysis combustion.
- The durability of the heater depends on the thickness of the metal (Δ) required for the manufacture of the housing. A container with walls of 4–5 mm is best suited for these purposes.
- When calculating the air distributor, it is important to correctly determine not only the diameter, but also the thickness of the piston. The massive part will heat up and actively heat the air entering the combustion zone, which will have a positive effect on the performance of the stove. In addition, a thin disk will not be pressed tightly against the top plane of the bookmark, and this will lead to an increase in the air gap and uneconomical fuel consumption. A piston that is too heavy, on the contrary, will tend to reduce the gap. Excessive compaction of the fuel can lead to complete attenuation of the potbelly stove. The situation is further complicated by the fact that the weight of a metal pancake depends not only on its thickness, but also on its diameter. Therefore, the larger the piston, the thinner the metal is taken for its manufacture.

The table for calculating the thickness of the piston will help you find the optimal ratio of the diameter and thickness of the piston pancake
- The gap between the fuel bookmark and the air distribution disc is determined by the height of the fins (blades) of the piston. For their calculation, there are also ready-made tables. If the dimensions of the structure do not fit into their framework, then the calculation of the blades is carried out by the method of proportions.

Table for determining the parameters of the blades is suitable for standard furnaces
- The efficiency of air supply to the combustion zone depends on the configuration of the fins of the air distribution plate. You should not follow the simplest path, welding straight pieces of corners to the piston or profile pipes. It is better to bend the blades in a semicircle and weld them in the form of a turbine. The air flow in this case will not be laminar, but turbulent, so the smoldering of the fuel, and hence the gas release, will be more intense. The advantage of figured blades is also that the flow of pyrolysis gases will be more actively pushed to the periphery, accelerating the gas circulation.
- When calculating the chimney, the formula S = 1.75P is used, where P is the heat output of the heater in kW / h. The resulting value is rounded up, adjusting the numbers to the diameter of the pipes that are available.
- At the entrance to the chimney, a butterfly valve is installed, which is called a gate valve. It will be needed to regulate the traction force.
- The cross section of the air supply pipe d must be 2 times smaller than the diameter chimney. In order to redirect its flow to the blades, a diffuser is installed on the air supply channel. For this purpose, you can use a disc Ø120–150 mm with a hole in the center Ø15–20 mm or any suitable part from automotive or agricultural machinery.
- A gap δ must be left between the opening in the loading hatch and the air supply pipe, which should be no more than 2.5 mm. It is needed to supply secondary oxygen to the afterburning zone. Here one must be especially careful and not exceed the recommended values, otherwise the excess air will “siphon” towards the chimney, simultaneously pulling pyrolysis gases into the pipe. For the same purposes, it is not necessary to refuse to install the collar. Its size L is taken equal to 80 × δ, but not higher than 200 mm.
- The length of the air supply pipe is calculated based on the fact that with the disc completely lowered, it should rise above the collar to a height of q=L+150.
Of course, it is not necessary to observe the dimensions of all parts of the furnace. Without consequences, they can be rounded in any direction. As for the gaps and vias, the correct operation of the heater depends on their size. These parameters must fully comply with the calculated values.
There is no need to install a furnace door for a potbelly stove with a diameter of 450 mm or more, since it is easy to load the unit with firewood through the top. If a gas cylinder is used as a hull, then difficulties during its operation await not so much during the laying of fuel, but when cleaning the potbelly stove from ash. So that a long, narrow container does not cause inconvenience during operation, you will need to install an ash pan door.
In order not to equip the opening for cleaning the oven, you can use a disc with sides, which is lowered to the bottom. A steel bar welded to its center will allow you to easily pull out the ash container. The metal rod does not interfere with the operation of the potbelly stove at all - after installing the ash pan on the bottom, it is passed through the air supply pipe.
Schemes and drawings allow you to accurately determine all the design parameters of the heater and build a productive potbelly stove from any suitable container. It is not necessary to adhere to the exact dimensions - it is enough to observe the ratio between all constituent parts designs.
Photo gallery: diagrams and drawings of a potbelly stove for long burning
Drawing of a pyrolysis potbelly stove with a water circuit Drawing of a potbelly stove with a convection casing Simple stove for firewood and sawdust
How to build a potbelly stove of long burning from a metal barrel
It can be built in just a few hours, and the material for work will be a used metal barrel from fuel and lubricants, a thick metal sheet and various pieces of pipes, angles and channels. Of course, so cheap option has certain disadvantages associated with a small wall thickness - both the heat capacity of the structure and its service life suffer from this. Nevertheless, the use of such an overall body has its advantages:
- the volume will allow the stove to work up to 12 hours on one tab;
- even if over time the walls of the barrel burn out, the body of the potbelly stove can be quickly replaced;
- the section of the loading opening will allow you to easily heat and maintain the stove, so you can do without arranging the loading and ash windows.
Step-by-step work will avoid mistakes and facilitate the manufacture of a heating unit, which can be useful for both a beginner and an experienced home master.
Preparatory work
For the construction of a simple wood-fired heat generator, any steel barrel for chemicals, fuels and lubricants, etc. is suitable. If there are small dents on its surface, then they must be leveled with a hammer and a sledgehammer, which is attached from the back. This work must be done carefully and accurately, otherwise, during operation, the air distribution piston will hang over the firewood, which will lead to a disruption in the normal operation of the unit.
If the walls of the barrel are covered with residues of petroleum products, glue or paint, then they are fired with gas burner or blowtorch. After that, all surfaces are cleaned with a hard metal brush. Of course, with full confidence in the integrity of the walls, you can do without firing and scraping the walls, but if the container has been stored in the open for a long time, then there is no better way to prepare it.

It is best to cut blanks from a thick metal sheet using a plasma cutter.
Since the piston and blades are made of thick metal, it will be quite difficult to cut them with a grinder. It is better to use the services of a car service for this or contact the production. As a rule, there you can find an experienced welder working with a flame or plasma torch. He will be able to cut the necessary details in a few minutes, and all that remains for you is to knock down drops of molten metal on an emery wheel.
next step preparatory work is the choice and proper arrangement of a place for mounting a potbelly stove. When installing it, it is necessary to ensure that several prerequisites are met:
- The subfloor must be a level, level surface. Regardless of how the stove will rest on the floor - with legs or the bottom of the body, the base of the platform is protected with non-combustible materials. It is best if it is fireclay bricks, but asbestos fiber boards or metal sheets can also be used. Of course, the last two options are only suitable for laying on non-combustible surfaces.
- The potbelly stove should be installed away from places where fuels, lubricants and flammable materials are stored. It is not allowed to install a wood-burning heat generator under attachments, shelves, etc.
- When choosing a place, be sure to take into account how the chimney will be arranged. If its entire vertical part runs outside the building, then part of the chimney is laid horizontally. Otherwise, the lion's share of the heat will simply be thrown into the air. If the pipe passes indoors, then the potbelly stove is installed in any way.
It should be understood that lengthening the horizontal section of the chimney by more than 400–500 mm is fraught with a decrease in thrust, which will eventually lead to a drop in the efficiency of the potbelly stove.
Like any other wood-burning heat generator with an open flame, a long-burning potbelly stove burns a considerable amount of oxygen during operation. Should be on initial stage consider how the air flow will be carried out. Without a quality ventilation system, the operation of the oven can be unsafe.
Step-by-step instructions for making a potbelly stove with your own hands
All the main work on the manufacture of this type of furnace consists of several stages:
- The barrel is placed on a hard, flat surface and the lid is cut off from it. To do this, it is best to use a grinder, cutting through the weld at the point of attachment to the body. This will allow you to carefully separate the upper part, resulting in a cylindrical body with a factory sealed edge. The cut off part does not need to be thrown away - after a little refinement it will serve as the upper hatch of the potbelly stove.

The lid from the barrel should be cut off as carefully as possible.
- The upper section of the barrel must be slightly bent inwards, reducing its diameter by 2-3 cm. To do this, it is convenient to use a sledgehammer and a hammer, the striker of which is substituted from the inside, below the bend line.

The upper cut of the container is folded inward
- The workpiece intended for the manufacture of the lid is placed on a metal plate, after which its side is bent outward with powerful blows of a sledgehammer. Such flaring is necessary in order for the part to fit snugly against the body. This method is not ideal in terms of aesthetics. Perfectionists can be advised to cut off the edging of the lid so that the part penetrates tightly into the cylindrical body. After that, a metal disk of the same diameter as the barrel itself must be welded onto the workpiece. A flat, flat surface will subsequently serve as a stove for heating water or food. Instead of a stopper, which is equipped with most barrels for storing fuel and lubricants, you can install a sliding gate. It will allow you to precisely control the amount of secondary air supplied to the afterburning zone.
- A hole for the air supply pipe is cut in the center of the cover. Its diameter should be 1–2.5 mm larger, otherwise there will not be enough air in the secondary combustion zone. Of course, if the upper part of the potbelly stove is equipped with an additional damper, then the pairing of parts can be made as tight as possible.

Before cutting a hole, the lid must be prepared
- Mount the collar. To do this, a strip 50–100 mm wide is cut out of a metal sheet, with which the hole made is scalded along the contour.
- For the manufacture of the piston, a steel sheet is taken with a thickness that corresponds to the calculated values. If you want to get the cheapest heating device, and the right material is not at hand, then you can cut off the bottom from another barrel. Since the thickness of the resulting workpiece will not provide the required rigidity and sufficient mass of the piston, small transformations must be done with the part. First, the metal edging that runs along its perimeter is folded inward until the metal pancake freely enters the furnace casing. It is impossible to cut off the side in any case - it will serve as an external stiffener. Secondly, to increase the mass of the piston, an additional load is welded to its upper plane. You can take any flat parts as it - gears, sprockets, pulleys, etc. The main thing is that they can provide the estimated weight of the air distribution device. An additional plus in this case will be the increased heat capacity of the piston.

The manufacture of the pressure circle depends on what material was taken as the basis
- A hole is cut in the pressing disk, equal to the outer diameter of the air supply pipe. After that, the blades needed to distribute oxygen over the entire surface of the fuel bookmark must be welded to the lower part of the piston. The width of these parts will form the height of the working area, and this has a huge impact on both the performance of the potbelly stove and its efficiency. In the manufacture of the piston, it is best not to deviate from the calculated parameters even by a millimeter.
- A pipe for air supply is welded to the pressure plate. To do this, the metal disk is placed with the blades down on a flat surface, and the installation accuracy is controlled by level or plumb - the parts must be connected in strictly perpendicular planes.

The air supply pipe must be level
- From the side of the air ducts in the center of the piston, it is necessary to weld a divider. If this part is cut out of a metal sheet, then drilling with a diameter of up to 20 mm is performed in the center of the workpiece.
- The upper section of the air supply pipe is equipped with a damper to adjust the amount of primary air. It is better if this node is equipped with some kind of latch.
- An opening is cut in the upper quarter of the cylindrical body for mounting the outlet pipe. This part is put in place and boiled with a continuous seam.
- WITH outside the bottoms mount the support frame with legs made from suitable pieces of pipes or corners.

Installation of a branch pipe for connecting a chimney takes place at the top of the barrel
- For the manufacture of the chimney, pipes with a length of 0.4–0.5 m and 4–5 m are used, which are connected through an angular transition of an increased diameter. A ball valve is inserted into the lower part of the chimney to remove condensate. The junction points are carefully sealed with asbestos or basalt sealant.
To eliminate temperature differences that lead to condensation, the chimney is equipped with an external casing, and the resulting space between its walls is filled with mineral insulation. In addition, the top of the chimney is protected from precipitation with a metal cap.
After installation in a permanent place, the stove is connected to the chimney and filled with fuel. Long-burning potbelly stoves are tested after the piston and top cover are installed.

Potbelly stove of long burning is ready for work
How to properly operate the oven
Only dry wood is suitable for use in pyrolysis heating furnaces. This is due to the fact that when burning wet fuel, a lot of water vapor is released, which reduces the temperature in working area. Of course, in this case, the effective combustion of pyrolysis gases is out of the question. In addition, there are other unpleasant moments associated with incomplete combustion of volatile components. First, cooling in the chimney, they fall on its walls in the form of tar, creosote and other hard-to-remove substances. Secondly, the content of hazardous chemical compounds at the outlet of the chimney exceeds all permissible standards, which negatively affects the environment and human health. And, on the contrary, when well-dried wood is burned, the exhaust gases consist mainly of carbon dioxide and water vapor, and the operation of the potbelly stove from the outside can only be judged by a small movement of heated air at the upper section of the chimney.
Before laying the fuel, the piston is removed and set aside, and the space inside the stove is filled with firewood. It should be remembered that the heat output and the duration of the heater’s operation depend on the packing density, so all the gaps between the logs should be covered with chips, chips, wood husks, etc. A rag soaked in kerosene or diesel fuel is placed on top, an air distribution piston is installed and the unit is closed lid.

For ignition, you can use a rag moistened with a flammable liquid.
The ignition of the stove is carried out with the damper of the air supply pipe fully open, throwing a burning rag into it, which is pre-soaked with barbecue liquid or other similar. After the firewood flares up, the air supply is reduced.
In order to make the operation of the potbelly stove safe, follow a few simple rules:
- If flammable substances (gasoline, kerosene, thinner, special products for wood stoves) are used to light firewood, then it is necessary to install a piston and close the stove with a lid before throwing a lit match.
- It is not recommended to use plastic, rubber, polystyrene and other household waste as fuel for two reasons. Firstly, this is due to the release of extremely toxic substances that cannot be burned even in the process of pyrolytic decomposition. Secondly, during high-temperature oxidation of such materials, a huge amount of soot is released, which means that you will have to clean the chimney several times a month.
Often, in order to make the potbelly stove more presentable, its body is primed and painted in the desired color. It should be understood that during the operation of the furnace, the paint will fade, so it is better to use only protective compounds designed to work at high temperatures.
Despite the fact that pyrolysis decomposition contributes to the most complete combustion of the fuel, a small amount of soot and ash is still formed during the operation of the furnace. To remove carbon deposits, you can use a metal scraper and brush. As for the ash, it is most convenient to clean the potbelly stove from the barrel with an iron scoop with a short handle. In this case, it is not necessary to remove all the ashes. A layer of ash 2-3 cm thick will work as thermal insulation, preventing the bottom of the heater from burning out.
Video: how a homemade potbelly stove for long burning works
Such a productive and economical heating device as a potbelly stove of long burning will allow you to successfully heat any technical and domestic premises. Thanks to a simple, undemanding design, you can build a stove with your own hands, spending only a few hours on it. Accurate calculation, accuracy in work and attention during operation - these are all the terms necessary to obtain comfortable, cozy, and most importantly, safe heat.
Thanks to my versatile hobbies, I write on various topics, but my favorite ones are engineering, technology and construction. Perhaps because I know a lot of nuances in these areas, not only theoretically, as a result of studying at a technical university and graduate school, but also from the practical side, since I try to do everything with my own hands.
The potbelly stove has always helped out in emergency situations and has been a reliable assistant to summer residents, motorists with a garage, as well as owners of small private houses.
Today, it often takes on a new look, developed by interior designers, so it fits well into the halls of elite mansions. Is it possible to make this useful, and sometimes simply necessary, heating device with your own hands if you do not have enough experience in welding and cutting metal?
Of course, yes, and once again, yes, in order to weld a potbelly stove, you just need to understand the general principles of metal welding, even if you get a crooked seam - you can always clean it with a grinder, look at the photo below, which furnace the novice welded, which the welding machine held only twice in a lifetime:
Tools required for the job
For the manufacture of any metal structures, a certain set of tools is required, which include:
- Welding machine, at least 200A and electrodes, protective mask and suit for welding;
- Bulgarian (grinder), cutting and grinding wheels for metal. Some curly parts can only be cut with a gas cutter.
- Skimmer(hammer);
- Metal brush;
- Ordinary hammer, chisel, pliers;
- Roulette, folding rule and chalk for marks;
- Drill and drill bits for metal.
Types of homemade bourgeois
For different rooms, you can choose your own type of potbelly stove, which is more suitable for technical specifications and by appearance. They are made from metal tanks, pipes of medium diameters, barrels, gas cylinders and sheets with a thickness of at least 3-5 mm.
For heating in the garage, any of the options for a potbelly stove is suitable, but for use in a residential area, it is better to refuse some models.
Therefore, you need to consider the most popular options for potbelly stoves in order to find out which one to choose and make yourself.
Potbelly stove at work - simple and cheap
This is exactly the option that is not very suitable for use in rooms where people live. The explanation is simple - when burning, oil mining emits a specific smell, even if a good hood is arranged.
Sheet metal is required for the manufacture 4-5 mm thick, from which all the necessary details will be cut. A pipe is also needed for the manufacture of some elements of a potbelly stove and a chimney.
In the diagram below, all the dimensions of the parts need to prepare.
- On a metal sheet, an accurate marking of all elements is made and cut out with a grinder. All edges of the parts are carefully cleaned.
- Round holes are drilled in the prepared pipe of the required height. It will connect the upper and lower containers of the potbelly stove.
- In the upper plane of the upper tank, in the place indicated according to the scheme, a hole of the required diameter is cut. It is offset from the center to the left side and will be intended for the chimney pipe. On the bottom wall, the hole is offset to the right side of the circle, and the connecting pipe will enter it.
- Two circles are welded to a piece of pipe, which will determine the thickness of the upper tank.
- Do the same for the bottom of the oven. Only a hole for the pipe to enter is cut in the center of the circle. In addition, another one is cut out, which will serve as a neck for filling the furnace. A sliding cover is attached to it.
- Three or four legs are welded onto the lower solid plane.
- For rigidity, the upper tank is connected to the lower metal brackets.
- In order for the stove to be beautiful and not rust, all welds are well cleaned, and then all surfaces are painted with protective heat-resistant paint.
- The last step in the work is connecting the furnace to the chimney.
Such a furnace works as follows: mining is poured into the lower tank, then with the help of a torch or rolled paper, it is ignited through the hole. The sliding cover on the hole is closed after the mining inside the tank lights up. Oxygen entering through the holes in the pipe that connects the two tanks contributes to intense combustion. Hot air passing through the top of the stove heats it up to a high temperature, so you can easily heat a kettle on its surface. Since there is always spent fuel in the garage, there will never be problems for refueling the potbelly stove.
Potbelly stove from an old barrel or pipe
This stove can be made from an ordinary metal barrel or a pipe of a certain diameter. It is quite suitable for installation in a residential area of a summer residence, and with a beautiful, neat design, it can also be suitable for a residential building.
- At the desired level of the future furnace, two rectangular holes are marked and cut out, which will be the entrances to the furnace and ash pan.
- The cut parts are useful for making doors. They are framed with metal strips, bringing them to the desired size, and a special handle with a latch is installed.
- About ten centimeters below the firebox door, inside the barrel or pipe, corner brackets are welded on which the grate will be laid.
- The grate can be independently welded from reinforcement.
- If the stove is made of a pipe, its bottom and upper part are welded.
- Legs are welded to the bottom bottom part.
- A hole for the chimney is cut out in the top panel, and a pipe is welded into it.
- Then the doors are installed on the fixed hinges. According to their location, a hook for the lock is marked and fixed.
- In order for the oven to have an aesthetic appearance, all welding seams must be carefully cleaned. If then the oven is covered with heat-resistant paint, then it will be impossible to distinguish it from the factory product.
- Then, when the stove is completely ready, it is connected to the chimney brought out into the street.
In general, a good option for a potbelly stove, if there is enough space for it in the room, since this model will take up a fairly large area. It should be noted that the top panel of the potbelly stove is large enough, and you can safely install a kettle or, for example, a frying pan on it.
Potbelly stove from a bad gas cylinder
The gas cylinder has an almost ready-made shape for a good potbelly stove.
- The top of the cylinder with a tap is cut off, and a plug is subsequently welded to this place.
- A square hole is cut in its bottom part, which will serve as the entrance to the furnace. The cut part should also not be thrown away. It is scalded, and thus the canvas for the door will be ready.
- A handle lock is attached to it, and the door is installed on welded hinges.
- Holes are made on the wall of the cylinder, which will be the bottom of the future stove - they themselves will play the role of a grate.
- Under them, a box made of thinner metal is fixed by welding. It will be an ash pan, for dumping waste from burnt firewood, which at the same time plays the role of a blower. It is also necessary to fix the door to the ash pan.
- After that, the legs are welded - they can be made from a metal corner or pipes.
- A round hole is cut in the upper back of the potbelly stove, a chimney pipe is welded into it.
- If necessary, you can also arrange a hob on top. To do this, it is enough to weld a frame of steel reinforcement on the top of the cylinder. On such a hob, it is quite possible to place two items - for example, for cooking and heating water.
A potbelly stove from a gas cylinder is perfect for both a garage space and a room in a country house.
One of the home masters shares his experience on how to make a potbelly stove with his own hands from a cylinder with its vertical arrangement:
Video tutorial on building a potbelly stove from a gas cylinder
Potbelly stove made of rectangular sheet steel
This is perhaps the most optimal, an aesthetic, compact version of all the bourgeois stoves proposed above. It is best suited for heating residential premises. The design of this stove is clearly visible in the two diagrams presented.
Compact, easy to perform "Gnome"
The first of them shows the oven "Gnome". It has a simple structure: two chambers - a firebox and an ash pan, a chimney pipe and legs.
The second diagram shows a more complex internal design of the potbelly stove, which will help it retain heat for a longer period. This potbelly stove is worth considering.
- To make this stove, you will need sheet metal, at least 3 mm thick, a 5 × 5 cm corner, a chimney pipe, and a cover for the burner.
- On metal sheets, markings are made and all the necessary details are drawn: the walls of the furnace, the bottom of the potbelly stove, the hob; grate, two internal metal plates that direct the flow of burnt gases, afterburn them, and delay the rapid release of heat.
- Two rectangular holes are cut in the front wall of the furnace for the firebox and the blower. Here, doors with locks and heck for them will subsequently be fixed on the hinges.
- A neat opening for the burner is cut out in the upper plane (depending on the size of the purchased part), as well as a hole for the chimney.
- Legs are attached to the bottom, bottom part.
- The side panels mark the place where the grate will be placed. Corners are welded to these places, they will become brackets for the grate.
- In order to make a grate, you can drill a large number of round holes in a sheet of metal, or weld a lattice of reinforcement.
- In the upper part of the potbelly stove, at a distance of 16 cm from the hob, a plate is welded, having a length of 8 cm less than the depth of the potbelly stove, i.e. it should not reach the rear wall of the furnace body by 8 cm.
- The same plate is welded to the back wall, 8 cm above the first plate, it should not reach the front panel also by 8 cm. Thus, after mounting all the parts, a labyrinthine a corridor through which hot air will pass, heating these plates, and not allowing the heat to immediately go into the pipe.
- Next, you need to mount together all the details of the potbelly stove by welding. All joints of parts are necessarily reinforced with a metal corner.
- Lastly, the chimney pipe is welded, and all welds are cleaned.
- To give the potbelly stove a spectacular look, it is painted with heat-resistant paint.
Rules for the safe installation of a potbelly stove
In order for home-made to bring only comfort and warmth to the house, and not create problems, it is necessary to follow safety rules.
- The stove is installed on a fire-resistant surface. It can be arranged from tiles or in the form brickwork. The walls around the stove also need to be protected from overheating. This can be done with fire-resistant special drywall or other non-combustible material.
- Flammable materials must not be placed near the firebox.
- The room where the oven will be located must have a good ventilation system. This is important in order to exclude the possibility of accumulation of carbon monoxide in the room.
- For the manufacture of any potbelly stove, it is necessary to use only high-quality material.
The potbelly stove will serve both effectively and for a long time, it will be a good helper in household chores and will warm you on winter evenings. The main thing is to think over the model well, make it carefully, and observe all the requirements for safe handling during operation.
 Brazier made of stone: material features and manufacturing options
 Blackroot officinalis cultivation
 Fuel Cells: A Journey into the Future
 Propagation of cacti: gardener's advice
 Teapot stand How to make a tea stand
 Indoor flowers with purple and red leaves: names, description, care
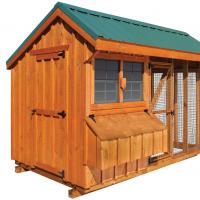 Warming the chicken coop from the inside for the winter How to insulate the roof of the chicken coop